
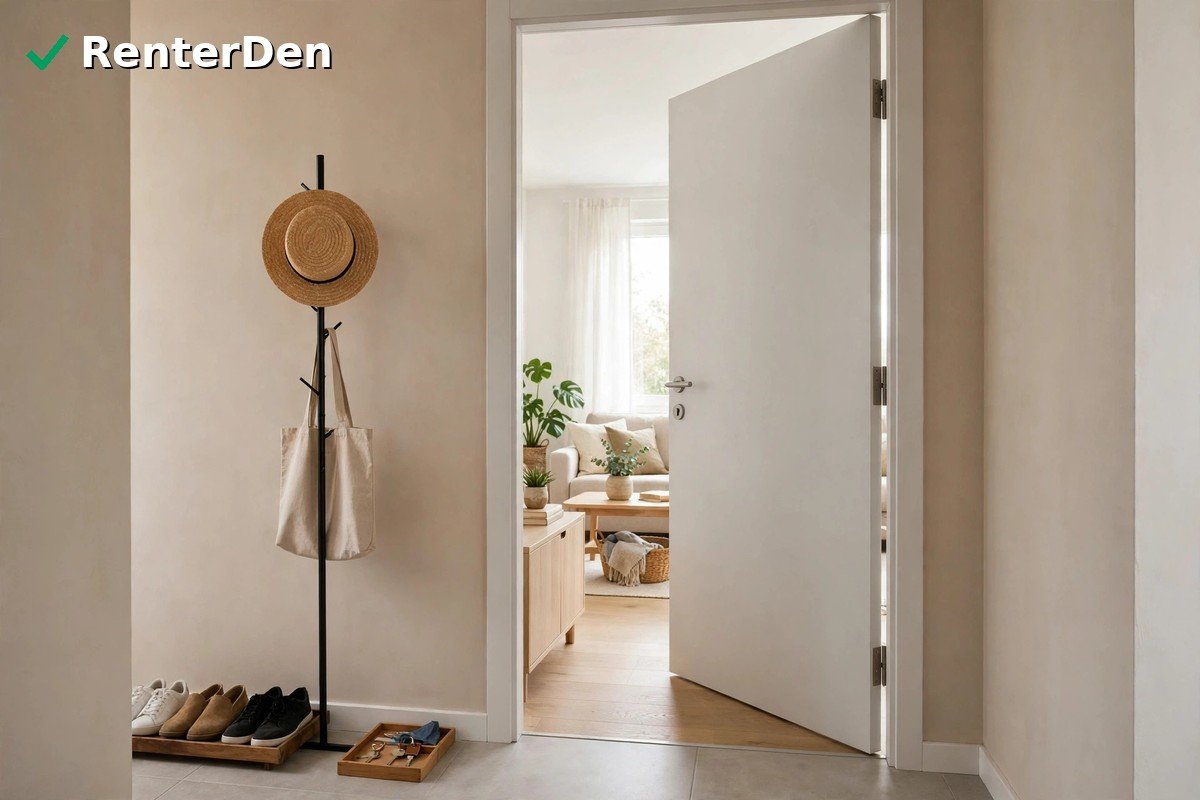
Door Opens Into the Living Room? Make an Entry
Quick triage: The fastest safe fix is a small, movable landing zone just outside the door swing — a tray for keys and mail, a low shoe tray, and one removable hook or freestanding rack for a coat. Before you buy anything, measure the door swing, the clear walkway width, and the depth of any bench or console. Do not drill into the door frame, glue hooks to painted walls, or place furniture inside the door swing.
Why the Rug, Hooks, and Tray Advice Falls Short
When a front door opens straight into a living room, there is no foyer to catch the mess. Coats land on the sofa, shoes drift across the floor, and mail piles up on the nearest flat surface. Most guides answer with the same three items: a rug, wall hooks, and a tray. That skips the detail that decides whether it works: the layout.
A rug under a swinging door will bunch up or block it. Hooks on the swing wall become unreachable or get hit. A slim-looking console can still eat the only path to the kitchen. The fix is not more entry furniture. It is a small setup matched to your door swing, wall space, and walkway. Everything here is renter-safe, removable, and portable, so you can take it when you move and leave no damage behind.
Verdict: Difficulty: Easy • Time: 15 minutes to plan • Cost: Free to plan • DIY
Measure Before You Buy
Five quick measurements prevent almost every entryway mistake.
- Door swing: Open the door fully and note the arc it sweeps. Nothing should sit inside that arc.
- Clear walkway width: Measure the path from the door to the next room. Keep room for one person with a bag, plus extra space for a stroller, wheelchair, or walker if needed.
- Usable wall length: Measure the flat wall beside the door, from the trim to the next corner, window, or outlet. That is your real space for a rack or console.
- Depth of any bench or console: Measure how far it sticks out. A piece that is too deep turns a walkway into a squeeze.
- Obstacles: Note radiators, heaters, vents, switches, and low windows. Keep fabric and shoes away from heaters, and never cover a vent or block a switch.
Photograph the door open and closed. Measure first, buy second — especially for benches, consoles, and shoe cabinets.
Verdict: Difficulty: Easy • Time: 10 to 15 minutes • Cost: Free • DIY
Layout 1: The Door Swings Against a Side Wall
The door opens inward and rests nearly flat against a side wall. The mistake is filling that wall, because it is only usable when the door is closed.
Use the hinge-side wall, or the wall just beyond the swing. A freestanding rack past the swing, a slim shoe tray beside it, and a small basket on a narrow console can create an entry without touching the swing. If the swing wall is the only wall, skip wall storage and use a freestanding rack clear of the arc. Keep any rug fully outside the arc and low-profile.
Verdict: Difficulty: Easy • Time: 20 to 30 minutes • Cost: Typically low • DIY
Layout 2: The Door Opens Straight Into Open Living Space
In a studio or open-plan apartment, the door may open into the middle of the room, with no side wall. The goal is to mark a boundary that does not block light, air, or movement.
A low, open-backed shelf, a narrow console placed perpendicular to the door, or a tall plant in a heavy pot can suggest an entry zone without closing off the room. Keep any divider low enough to see over, with a clear path around both ends. Shoes go in a tray on the entry side, so the zone works the moment you walk in. This pairs well with the Living Room section, since entry and seating share the same floor.
Verdict: Difficulty: Easy • Time: 30 to 45 minutes • Cost: Typically low to moderate • DIY
Layout 3: The Door Is Next to a Radiator, Window, or Tight Corner
A radiator, low window, or tight corner shrinks your options. Do not hang coats over a radiator, stack shoes against a heater, or block a window so fully that you lose daylight or cannot reach it.
Go vertical only where it is safe, and portable everywhere else. A freestanding rack a short distance from the radiator, a shoe tray on the cooler side, and a removable hook rated for the weight can work, if the adhesive suits your wall type and is removed as the maker directs. Test one hook with a light item first. If the corner is too tight even for a slim rack, shrink the job: one tray for keys and mail, one pair of indoor shoes, and a hook on a nearby shelf can be enough. A small entry you actually use beats a full setup that blocks the door.
Verdict: Difficulty: Easy • Time: 20 to 30 minutes • Cost: Typically low • DIY
What Goes Where: Shoes, Keys, Mail, and Coats
Give every item one home inside the entry zone. Shoes belong in a single tray, limited to pairs you wear most often. Out-of-season shoes belong in a closet, not by the door. Keys and mail belong together in one small tray, where you can reach them without stepping into the swing.
Coats need the most honest limit: one hook per person for daily use. Extra coats belong in closet storage, planned with ideas from the Closet & Storage section. Reset rule: shoes in the tray, keys in the bowl, mail sorted on the spot — keep, recycle, or file.
Verdict: Difficulty: Easy • Time: 15 minutes to sort • Cost: Free to low • DIY
Renter-Safe Setup: No Drilling, No Damage
Start with furniture that stands on its own: a freestanding rack, narrow console, bench, or shelf that needs no wall fixing. These leave nothing behind and move with you.
For light items only, removable adhesive hooks can help, but treat them as a trial. Check the weight rating, follow the maker’s removal instructions, and avoid surfaces the maker warns against. Never use adhesive or screws on a door frame, and never hang a heavy mirror or shelf from adhesive alone.
Anything drilled, glued permanently, or screwed into a wall or frame goes last, and only if no renter-safe option works. Warning: drilling or permanent gluing can cost part of your deposit and may break your lease rules, so get written permission from your landlord first, and skip it entirely if a freestanding or removable option does the job. In most small entries, it does.
Verdict: Difficulty: Easy • Time: 20 to 40 minutes • Cost: Typically low • DIY; no professional needed
When It Does Not Fit or Fails
The door hits the furniture. Move the piece completely out of the swing arc, even if that leaves a gap. If no position clears the arc, use a smaller tray or rack.
Hooks peel off. Remove the hook, clean the surface as directed, and do not re-stick the same strip. Switch to a freestanding rack, or use the hook only for a light item well under its rating.
The tray overflows. The entry is holding too much. Move out-of-season shoes and extra coats to closet storage, cap the tray at daily pairs, and sort mail daily.
The walkway is blocked. Remove the deepest piece first, usually the bench or console. A clear walkway matters more than a seat for shoes — sit on a nearby chair instead.
Verdict: Difficulty: Easy • Time: 10 to 20 minutes to fix • Cost: Free to low • DIY
Frequently Asked Questions
Do I need a rug at the door? No. A rug helps only if it lies flat, stays fully outside the door swing, and does not slide. If the door catches it, skip the rug and use a shoe tray instead.
What if I have no wall space at all? Use a freestanding rack or low shelf unit to mark the zone, and keep the setup to a tray for keys and a tray for shoes. A small, clear zone works better than storage squeezed against the door.
Can I use removable hooks in a rental? Yes, for light items, if you follow the maker’s weight limit and removal instructions and avoid surfaces the maker warns against. Test one hook first, and switch to a freestanding rack if it fails.
How do I keep the entry from spilling into the living room? Keep the zone small, give every daily item one home inside it, and move everything else to closet storage. Browse more small-space ideas in the Entryway section, and reset the zone each time you come home.
Verdict: Difficulty: Easy • Time: 5 minutes • Cost: Free • DIY